Raising 3 kids - two little gentleman and baby girl. What have I done? I have brought three people into this crazy world. . . . and now I need to teach them some mommy stuff. To see the family adventures live, watch our YOUTUBE Channel https://www.youtube.com/channel/UC2m As our blog grows so do we, our family hobby is insect collecting, and travels. These blogs are about mommy observations in our day to day lives, in real life photos showing us as we grow.
Monday, February 6, 2017
Moms Summer Bucket List
Friday, June 26, 2015
Our Summer Bucket List 2015, free fun with kids all summer long
If you are reading this post, please post a comment below on what you liked - or didn't - about this read. Does the topic interest you and you want to know more? Submit a question and I am happy to tackle it.
Wednesday, November 5, 2014
Happy Halloween Book of Doom, Written by Older 9YO Son
Thursday, October 30, 2014
Going for a Walk, Again, and Again, and Again...
The other thing I love about walks, is it has built in education and concepts that all her kids need to learn. Clothing that's appropriate for the weather, reminders for moms and dads when we should wear hats gloves and scarves, when do we wear our snowboots versus our boots for fall. Gym shoes or crocs today? Did you remember to go potty before you left the house? Do you have socks on? All things we need to consider and teach our kids, at any age.
Make mistakes. Breathe, reflect and Laugh.Out.Loud
Monday, March 24, 2014
Mommy Made Hand Assembled Toddler Hospital Homecoming Gift
Kids are stellar in play based learning. Kids understand the basics if what's happening to them and these ideas are solidified in play. This was a mommy made gift when I didn't find much in ideas online. I wanted something simple that the kids could play with based on their understanding of the experiences that were happening not only to the sick nearly one-year old, but for his brother and sister, who were also experiencing this illness crisis (because when our kids are sick it really is a crisis).
This little Hospital Homecoming kit makes a fun gift, but it's also a fun simple kids activity to assemble at home too.
Handmade Kids Birthday Gift and Hospital Homecoming, a photo by areyousureaboutthatblog on Flickr.
Our Homecoming from the Hospital Kit:
- A new Elmo doll
- Elmo wrapped in a stretchy piece of bandage (from home)
- a bandaid on the bandage
- a box / container for our Doctor supplies: a small sponge square, an empty travel size shampoo container (which we use in the tub so we have plenty), a small notebook for writing down symptoms and a pen, get better stickers, pill bottle, bandaid box with 5 real bandages, and a small cup for water or syrup sipping.
Some parents feel children shouldn't open pill bottles, we advocate for teaching responsibility and never playing with real syrups and medicines. Also, parental supervision should be included so the blue bandage which is removable doesn't go around a toddlers neck.
Of course my kids made a handmade get well card too. We don't feel spending loads of cash is necessary to make fun, heartfelt gifts.
Make Mistakes. Breathe, Reflect. And Laugh.Out.Loud
Saturday, March 8, 2014
Easy Kids Activity: Tell Me a Story with Magnets
Making dinner can be a challenging time. The Kids like to stay with me in the kitchen so I include them in the cooking whenever I can. But then terse times I need to occupy them. My younger son was playing with his Refrigerator magnets making the pieces "talk" to each other. When I asked a few questions about his story, eureka! A new Kids activity struck me.
We have many, many, many magnets that we have collected through the years. Alphabet letters, Melissa and Doug animals and dinosaur magnets, vacation souvenirs, a farm book with farm animals, and responsibility / rewards chart magnets. I keep things in a storage "just in case bin" or circulate some of these through so we don't get bored with them. This is a sample of the magnets from the fridge.
Easy Kids Activity: Tell Me a Story Magnets, a photo by areyousureaboutthatblog on Flickr.
Our Tell Me a Story Game:
1. I grab 3 - 4 magnets from the storage bag and put them in a row on the fridge.
2. We talk about the picture on each magnet.
3. Then the kids "take a minute to think about a story using these 3 magnets." (At first, I had to make up the stories so the kids would get the idea of the game. Since about a dozen times playing, the kids now get more detailed, and very elaborate in their stories. Which may require more "thinking time.")
4. When my younger son is ready, he starts telling me his story.
5. PARENTS NEED TO LISTEN. Even though I am cooking (usually), I always stop to fully listen to the story. Its often short and I can spare the 1-2 minutes it takes him to tell me.
6. Then its moms turn to make up a story. I go last because I have found over time that my son simply imitates my story on his turn and just changes a few things around.
7. Pick new magnets and keep "story telling."
Variations:
-- Sometimes the kids pick their own magnets to use.
-- Or they pick some out for mom to make up a story.
-- Baby girl likes to take the magnets and "act out" her stories. Or she repeats segments of the story like "Roars" when my son said the Lion Roared at the Farmer. She is learning the game early on and will be vary familiar as her vocabulary grows.
-- We often put criteria on the story depending on what new things are happening in our lives. For example we have required many stories to "take place in Japan," when my husband and I were traveling there. Or my son makes the characters repeat an activity he learned in school that day.
The options are endless. We have also made up stories using the action figures we take to the car, and we have even started making up our own endings to the books we read at home. That's been really fun.
I hope we have introduced an easy, low-cost, game that's fun for kids.
Make Mistakes. Breath, Reflect. and Laugh.Out.Loud
Friday, February 14, 2014
Creativity in Kids: Inspiration is Everywhere, If Parents Let Them Lead
Creativity in Kids: Inspiration is Everywhere, If Parents Let Them Lead, a photo by areyousureaboutthatblog on Flickr.
I didn't receive any invitation to said party. However it's a frequent topic at home lately. So today we were watching Curious George on PBS and it's was an episode where a colleague of the man in the yellow hat made an instrument. Then the commercial break showed kids making their own instruments from bowls, pots, cups, and the almighty multi purpose rubberband!
Here's my sons guitar drum. Wearing his ninja headband, because at nap time we read Magic Treehouse Night with the Ninjas.
To learn more visit my blog at areyousureaboutthatblog.blogspot.com
Friday, November 15, 2013
Homemade White Clay: Why we need to Fail with our kids
Homemade White Clay: Why we need to Fail with our kids, a photo by areyousureaboutthatblog on Flickr.
Venting time: can't do any if this fun "white clay ornaments" and painting them afterwards if the dough flakes and when you finally do get an ornament made it disintegrates coming out of the oven. Vent complete.
We totally enjoyed the mixing, measuring, stirring and talking about our science, err um, I mean fun craft. I squeeze I learning everywhere we can!!! We ate lunch as the dough cooled for about 10 minutes or so.
Project Fail, White Clay Dough
Recipie we followed:
Bright White Clay Dough
Ingredients:
2 cups of baking soda
1 cup of cornstarch
1 cup of water
Directions:
1. Combine baking soda, cornstarch and water in a medium pot and stir over medium heat until all ingredients are dissolved.
2. Continue to stir over medium low heat until mixture thickens.
3. Once thick, immediately remove from heat and transfer mixture into a mixing bowl. Be careful, mixture will be hot!
4. Cover with a cold damp dish cloth until cool enough to knead.
5. Knead dough until soft and smooth. If mixture is too dry, add a few drops of water at a time and knead until a softer, workable consistency is reached.
6. Roll out dough to 1/4" and cut into shapes as desired.
7. Bake finished creations on a parchment paper covered cookie sheet in a warm oven (I do mine at 175 degrees F for about two hours, flipping them over about half way through baking.) Allow to cool completely in the oven.
8. Once completely dry, finished creations can be painted with acrylic craft paints and sealed with a craft sealant.
9. Wrap unused dough in plastic wrap to keep it fresh.
We did make the dough by heating ingredients in the pot. My first tip that is failed was the smooth texture of our version. It should have been "stickies" and looked more lumpy. And just as every good scientist knows, you will learn during the process, and learn from your failures.
Here's younger son enjoying the warm dough.
Here my younger son is enjoying how warm it is to his hands. He's been under the weather so mommy's homemade chicken soups in the pic too.
My next indicator of failure was the lack if bonding in the clay / sticking to the table and not as pliable as it should be.
Younger son loved playing with his "mountain." He wasn't into ornaments and cookie cutter shapes. He instead had the "cat" eat the "fish" but applying one cutter image over the other. And I can't say enough about the gross and fine motor skills needed to push, press, pinch, and shape the dough.
He was not frustrated - as was the adult in the room (me) - with the dough flakes, pieces and chunks that were falling off said mountain.
Baby girl enjoyed watching us, and touching the warm dough. Otherwise he was more into the cookie cutter shapes, and less into playing with the dough.
I rolled out the dough, into thicker and thicker segments. The cookie cutter shapes would break apart. Then the dough would stick to the table. Just frustrating. Add the flaking dough and it was not fun (for mom).
However baby girl loved flaking pieces all over the floor. And throwing cookie cutters on top.
Afterwards I took my dozen ornaments in animal shapes into the oven for 60 minutes at 175.
Here's our table after the experiment. Younger son is putting flakey dough remnants into a Baggie (so older son can enjoy after school).
And like our favorite clean up time song says: "you can clean where it's small and I can clean where it's tall." For the first time my 4 year old used the vacuum cleaner and picked up the flakey pieces. Baby girl and I wiped up the table each with our own sponges.
Cleaning may have taken longer then the entire project - cooking and molding together.
As for the baking, everything went smoothly. Then I removed the ornaments, and as the tray cooled I nudged one, and the leg came off. I nudged the duck beak and it flaked apart. All the pieces disintegrated. All of them. And the little rolled "balls" of dough we thought we'd make marbles from, they cracked, and dented. So interesting flops all the was around.
But even with the failures, we had fun. And we lived a real experiment. We need to fail with our kids too. Talking about our projects. What we were making. How it felt. It was "fun mommy." And then as you know real life doesn't work 100% of the time. So my kids also need to experience failures so they know how to handle disappointment. And they can learn to persevere, and try again, and again until we reach success. And you can't beat that.
The flop
We think we didn't add enough baking soda. My younger son remembers adding 1 cup of everything instead of a single 2-cup ingredient.
We will revisit this project. And try a smaller batch recipie. It's a low cost flop, but a high impact failure experiment... Again positive for my kids experiences.
Make Mistakes (like I did). Breathe. Reflect. And Laugh.Out.Loud. It helps with coping skills and failures.
Wednesday, November 6, 2013
Young Son Wrote the Word "MOM"
I am so completely crying right now. As we eat our lunch my young son wanted to color in between bites.
After I prepped our lunch and took a few bites, I look back at his sheet and he wrote "MOM." That's his first written word, besides his name.
"Where did you learn that word?" He replied "it's in your necklace.
My Son Loves to Read, But Why?
I remember growing up and my mom constantly reading books. I'd be up watching late night TV and she'd be in bed, reading!
We always had a library at home too. Bookshelves covered in books, and then a whole room dedicate to books! I wish I read as much as I used to. I am still surrounded by books that I've never had a change to read, but I can't bear to part with.
As for my so , he definitely has the reading bug. We finish our bedtime book and he's off reading for another 20 minutes or so. I can only assume his love of reading comes from two factors:
My son reading in bed, after our evening story. He's really into the Diary of a Whimpy Kid Series (which he completed all 4 books since summer, over a 6 month period). Here he's feeding (yes, it's like he's feeding on it) on the Nate Series...
1. Ever since he was 6 months old we've read out loud. We've read a book every night for the first 5 years. And during the day - our before school was in our life routine included reading, as we woke, as we ate meals, before naps, and after afternoon play. Concluding the day with, yup, 2-3 bedtime books! Hmph.... I think I'm onto something.
2. Another big factor in reading at home is our own library. The kids always get to buy books when we are out thrifting. They pick whatever they like, even if the books above their age reading ability level. We had a 3rd grade school numbers math activity come home. "Count how many books you own at home." So we did.... 71 on the bookshelf, 25 on his bed night stand, 50 in the closet on the shelf, 45 in the book basket in his sisters room,... you get the idea. We also included the toy room, the kids basket in my room and our lunch time kitchen books. And the grand total was 512 kids books!
I'm still shocked! That's absurd right. Don't assume we hate read them all. Again, as we started the counting activity I didn't think that we had 512, I guesstimated it would be 150, maybe 200? As we counted the books we reminisced what each one was about. There were only a handful we hadn't read, or read fully because they were question and answer books, or reference books, or a dinosaur directory.
Why does my Older 8 year old son love to read? It could be our no TV during the week policy and being surround by 512 books.
Tuesday, November 5, 2013
East Kids Nature Project: Leaf Rubbing
On a recent walk around the block. we collected leaves of various shapes and colors. Then we proceeded to lay them out in my Older Sons particular order....we secured paper by taping it down on all sides of our cardboard, and rub impression onto paper with color crayons and viola!
This was a fairly easy project to put together. It hung in our front window after we admired it an talked about the interesting "veins" and patterns the leaves made.
Here he is just starting out the rubbing. It was a quick project to get thru, once he picked his colors he was done in 15 minutes or so.
| Areyousureaboutthatblog Older Son Picking his Color Scheme |
| Areyousureaboutthatblog Color Scheme and Variations on the Leaf Details |
| Areyousureaboutthatblog Close Up of the Leaf Veins and Detail |
Level of Difficulty: EASY
Time: Collecting leaves, may vary. Not including getting coats and shoes on a few minutes. More selective kids may explore the leaves longer, being VERY specific about shapes and colors. That's part of the fun, so don't rush the to pick out there leaves and quickly get to coloring. The outdoor exploring is just as vital!
What You Need:
- Bring Enthusiasm!!
- Leaves, easily collected on a walk through your neighborhood, or around the block.
- Paper, white works well
- Hard surface. Place leaves on the floor and then tape paper over it - watch out for coloring over the edges. If the floor is hard wood, or tiled, the "edges" or flooring detail may poke thru the rubbing effect / might be pretty cool!!
- Crayons, preferably with paper removed slightly or completely. When rubbing or "coloring" just using the crayon tips, less of the leaf detail comes through.
Questions to ask during the project:
When Outside Collecting Leaves - explain the project "We are going to collect some leaves. We want big ones, and little ones, and as many colors as we can find. Then we are going to do a neat magic trick and copy the leaves onto paper using our crayons. It will be amazing!"
Just conversation starters.... don't grill you child with these questions, engage them in conversation!
What color leaves did you find?
Is this a red leaf?
I wonder why the leaves are changing their colors from green to...yellow, red, etc.?
Is that leaf bigger then your foot?
Gee, good thing the leaves are on the ground, so we don't have to climb a tree to get them...why ARE Those leaves on the ground?
At Home:
Layout the project, encourage your child to pick which leaves and allow them to layout out as many or as few as they'd like to prepare for the rubbing. Their is no "right way."
Then tell them it's the "adults part of the job to do" - taping the paper down.
What colors will you pick to rub over your leaves?
What do you think will see when you start to color?
What are those lines on the paper from?
Looks like magic, the leaves are coming thru the paper...
Which one is your favorite leaf rub?
Why do you like it?....(again there are no "right" answers)
Enjoy your quality time together. This quick project will leaf memories for months to come.
The Days are Long, the Years are Short.
Make Mistakes, Breath, Reflect and Laugh.Out.Loud.
Thursday, September 19, 2013
Early Math Addition Game with Dice: Math Facts Addition and Penmanship Practice all-in-one
Now we have added a penmanship element. We have to write the addition problem from the dice and then write the answer. The first person to complete the math problem rolls again. If the other players still writing the previous math problem he might not even see the next roll, and that's okay, it's part of scoring. Whoever has the most problems written at the end of the game wins. We set the kitchen timer for 1 or 2 minutes, and off we go.
![]() |
| areyousureaboutthatblog Math Facts and Dice Game |
More sensory bags... Some Details on What to Use
Wednesday, September 11, 2013
A Birthday Treasure Hunt
My older son stopped to take Notes of the clue hints, the other two tagged along.
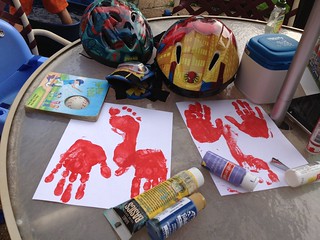
Making a MESSterpiece
My husband actually can't even walk around barefoot because his feet are so sensitive to pebbles and the concrete. We think that since his mom grew up in a poor country, having shoes (and wearing them) was a sign of wealth. There was NO walking around barefoot, period. My poor MIL probably thinks I'm nuts, but then again that could be why she always buys the kids gym shoes.
![]() |
| areyousureaboutthatblog Barefoot is Best! |
![]() |
| areyousureaboutthatblog Making a MESSterpiece... Full On and IN |
![]() |
| Areyousureaboutthatblog Baby girl loves MESSterpieces too. |
![]() |
| areyousureaboutthatblog Making the Most of Painted Hands |
Monday, August 19, 2013
Re-finish Frames for Fathers Day gift.
Um, this is NOT recommended as we used acrylic paint (for permanence in the project and Kid Art.... it is STILL on my sidewalk a year later).
Wednesday, June 19, 2013
Paper Chain Links Project to Help "Count Down" our Return
We kept this project super simple, so we don't drag out the longing and missing that will be going on. We kept it positive and used the crafting time to talk about our feelings and the fun things they will be doing at grandmas house.
What you need:
-scrap paper, we used colorful construction paper
-kids scissors, one per child
-markers and crayons
-a ruler
-a pencil
- a glue stick
Mom used the ruler to draw out straight lines on the long side of the paper - roughly 1/2 to 3/4 of an inch wide pieces. Each child would get a piece and start cutting along the line. My 7 year old son showed me his "creative wave cuts" he learned in art class. The 4 year old cut the same wave lines, however unintentional.
![]() |
| areyousureaboutthatblog.blogspot.com cutting our paper strips |
![]() |
| areyousureaboutthatblog.blogspot.com cutting our paper strips |
Then my oldest and I wrote "messages" to each other and the things as dictated by my younger son. They each colored "art" onto 1-2 strips as well.
![]() |
| areyousureaboutthatblog.blogspot.com writing our messages |
Last we glued the paper strips into loops with the words facing out. Then I explained to the boys that Each day we are away from them they will rip off one loop and read the message.
*Little MATH BONUS *:
- We needed to count on the calendar how many links, or many days, mom and dad will be away.
- Then we started cutting the strips, and half way thru cutting, we "guesstimated how many more we would need."
- I explained that after they rip off one link, they can "count how many days are left until mom and dad return from their trip."
- Another math bonus is the kids started measuring the length of the chain compared to their height.
![]() |
| Areyousureaboutthatblog.blogspot.com starting to measure our Paper Chain |
- Then we estimated how many links it would take to get to their respective heights. It was a wonderful sidebar of learning.
What my kids don't know is I included a fun activity message in two of the strips to encourage they (and grandma) have some extra fun. One strip has a "nature scavenger hunt" (inspired from Pinterest) activity paper clipped in and the other tells them to use there glow sticks that night.
Some of our messages/reminders to each other and include:
"I wonder if mom bought my Japanese Fan and Sumo Wrestler toy yet?"
"Baby girl, don't pull your brothers hair!"
"Mom, we love you!"
"Go on a Nature Scavenger Hunt! Mom included your checklist."
"We probably miss our Babcia and Ciocia at home, let's call them and see how they are doing."
"Mom and Dad Love you and Miss You Bunches! We can't wait to see you soon!"
"Go to the beach today. And if you did already/did that yesterday, then go eat ice cream instead."
![]() |
| Areyousureaboutthatblog.blogspot.com Surprisingly a wonderful coincidence, the Paper Chain is as tall as my young son.
I am certain we will all enjoy our time away from each other. And I will certainly enjoy returning home to my darling kids. In the meantime, I think this Paper Chain will keep them remembering a fun project with mom!
"The Days are Long, the Years are Short."
|
Monday, June 10, 2013
Toilet Paper and Telescopes
So I asked my older son to fetch me a roll. "Mom when your done, make sure you save me the roll so I can make a telescope." Flashback to two days ago, I was packing a huge mirror gift for my cousins 40th birthday party and used up the remaining roll of wrapping paper. And I didn't toss the inner cardboard roll. I put that in the kitchen near our craft station - knowing we'd need it sooner or later. Little did I know how soon.
I told him where he can find the ideal size telescope roll, and he and his brother felt inspired to create.
![]() |
| areyousureaboutthatblog.blogspot.com |
I love when these boys make something from their imagination. This telescope will be around for a few days. They usually make a craft, play with it that day, use it the next day, maybe end up outside playing with it, and after 1-2 weeks it'll be found, completely used up :-) To Mom's complete satisfaction too.
"The Days are long, the Years are Short"
Thursday, June 6, 2013
Kids Create on the own Inspired Time
So we now have a craft station. This shelf is in out kitchen with he kids art materials fully accessible. When they feel inspired to create the don't have to ask for their paper and crayons. Today, my younger son felt inspired.
Here he is creating and his final art work.
This same preschool teacher had the kids journal every two weeks or so. The kids would either get an alphabet letter they write and then draw things that start with that letter sound or listen to a story they can draw about and retell in their journal. Usually it's their favorite scene or a continuation of the story.
After the drawings completed, kids bring up their art to the teacher who writes a word for the objects the kids point out ". with the story project the kids dictate a story (if applicable) in addition to the object labeling.
Tips:
You art station can be as simple as a basket with paper and crayons that always kid accessible. This is how I Started.
Look around the House, I am certain you have items (pens, pencils, scrap paper) readily available.
Sit with your child the first time they draw. Don't interrupt them in their thoughts. But when their done ask questions like: "this is beautiful, can you tell me what's happening here?" And "what is this scene about?"
Date and sign the art. We have a folder I can sort thru later when we decide what goes into our keepsake folder.
Good luck, an happy crafting!
"The days are long, the years are short."
Thursday, February 28, 2013
Salt Glue and Paint Toddler Project
Materials you will need:
-- Tray (to catch the salt and possible paint spills)
-- Glue
-- Construction paper or sturdy paper - any color
-- Paints, we used professional grade water colors and drenched in water. I would recommend craft acrylics watered down for an even deeper color.
-- Salt, we used koscher salt for a more gritty feel, but regular table salt will do
-- Paint brush or eye/ water dropper
If you are reading this post, please post a comment below on what you liked - or didn't - about this read. Does the topic interest you and you want to know more? Submit a question and I am happy to tackle it.
1. Glue away on your sheet. Any design or pattern will do. Let you child experiment - during this step they might make thin lines or large globs. Once you get thru to step 4 they can see the various effects of salt absorbtion and color mixing, etc.
areyousureaboutthatblog
|
2. Cover you glue with salt. Be generous. We let our salt sit for at least 15 minutes to absorb into the glue. So we went and played freeze dance while the excrutiating time passed.
![]() |
| covering the glue in lots and lots of salt, areyousureaboutthatblog |
3. Pour off the excess salt (we saved it into another container for a sure to be future project). We used water colors an eye dropper to pick up the water and drop it on the salt. A paintbrush will work just as well. We drenched the salt in the paint. This picture doesn't do justice to the cool way the color spread thru the salt and the depth of color.
![]() |
| start applying drops of color to the glued on salt, areyousureaboutthatblog |
![]() |
| the happy artist with his new color salt work of art! areyousureaboutthatblog |


.jpg)
.jpg)