When I was about 12 years old my father went on a trip to England and Scotland visiting extended family. When he returned he brought me a traditional skirt from Scotland. On my young body I wore it with sweaters and turtlenecks in the cold Chicago Winter.
As the years passed somehow I had kept the skirt. So many of my own treasures from many travels were lost in moves (or I wasn't encouraged to keep them). So this skirt "surviving" was a fun find for me. All these years I didn't know what to do with it. One day I was going thru my keepsake bin and came across the skirt. As I monitor fashion ideas on Pinterest, clearly "tartan blanket scarves" are all the rage this season. And so came my "PINSpiration for a scarf."
I came across some sewing techniques on pinterest as well. There are several pins on 4-point sewing techniques to make shapes and add structure to materials. Then I saw blouses with a tuck and fold stich. I realized the existing fold over on the traditional plaid skirt will convert nicely using this stitch method.
I came across some sewing techniques on pinterest as well. There are several pins on 4-point sewing techniques to make shapes and add structure to materials. Then I saw blouses with a tuck and fold stich. I realized the existing fold over on the traditional plaid skirt will convert nicely using this stitch method.
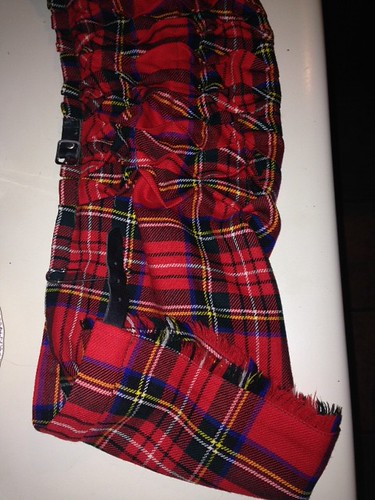 |
| Tuck and fold stitchs (top) and the skirt front flap is left flat (bottom of picture). This is intentional since when I played with the various folds, I get alot of variety for wearing the scarf with some of the skirt left not stiched /detailed. |
Early in the fall - post the suessical the musical sewing - I kept my sewing machine out and accessible. I put the skirt on and just started playing with it, folding it different ways.
I had to decide:
This project ultimately took 3 -4 days. Not 8 hour days spent sewing. 3-4 days because of those previous in between interruptions from the kids needing a snack, help with a toy, a reminder to behave and play together, etc. etc. etc.
I am very very pleased with the results. It is so use-able to "dress up" or "down" and outfit. It's unique and stylish. I love LOVE love the structure on the scarf - it holds shape amazingly. Converts outfits easily into something stylish with jeans, basic black or blues.
I had to decide:
- where to move the two buckles
- to keep the large skirt flap folded or flat (I made a hole so the belt hook can hold it up)
- I had to decide the distance between the tuck and fold stiches
This project ultimately took 3 -4 days. Not 8 hour days spent sewing. 3-4 days because of those previous in between interruptions from the kids needing a snack, help with a toy, a reminder to behave and play together, etc. etc. etc.
I am very very pleased with the results. It is so use-able to "dress up" or "down" and outfit. It's unique and stylish. I love LOVE love the structure on the scarf - it holds shape amazingly. Converts outfits easily into something stylish with jeans, basic black or blues.
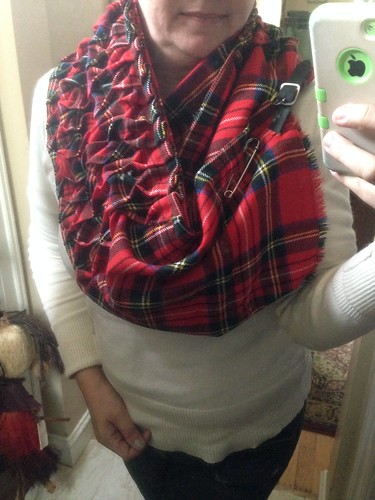 |
| Plaid skirk scarf conversion, worn loose showing the buckle details. Tuck and Fold Stitch approx 3/4 inch spacing. |
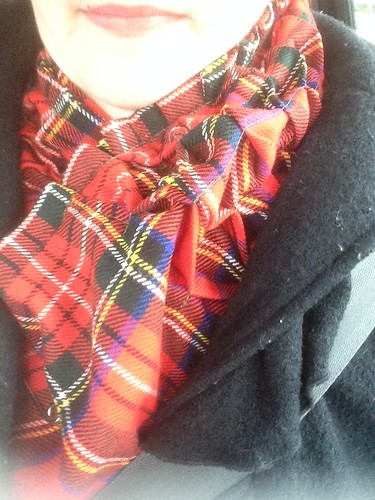 |
| Plaid skirt becomes a scarf conversion, worn snug for warmth to shield the windy Chicago weather. |
My favorite part of this project was my baby girl. She wanted a matching scarf! "Mommy , I LUV your new scarf, can you make me one?" Me - (Gulp? From Scratch? I just got done making over 100 costumes! ) "Of course honey!"
I remembered seeing some plaid skirts in her storage bin of "older" girl clothes I had in the attic. Digging I went. And sure enough she had a red paid scarf.... perfection.
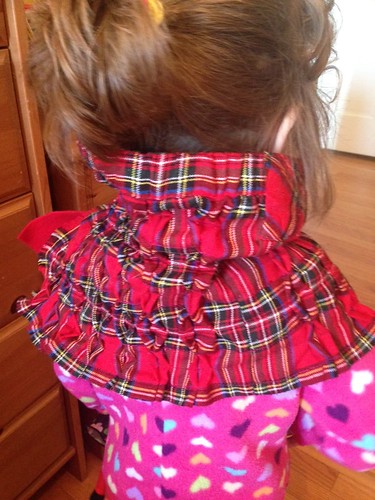 |
| The back of baby girls scarf. Has lots of structure, to keep its shape. The benefit of the skirt waist reinforcement and the tuck and fold stitch throughout the balance of the material. |
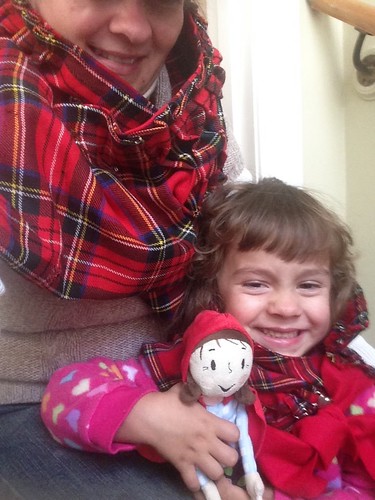 |
| Mommy and Baby Girls matching scarf. I can't imagine us wearing "matching" clothes when she is older, so I am soaking up her love of mommy's style now. . . while it lasts. |
The skirt had a nice trinket detail on the front, we use that as a fold over point to secure the tie. She looks adorable. And her tuck and fold stitch went smoother than mine.... practice makes
Make Mistakes, breathe, - make her the matching scarf - reflect and Laugh.Out.Loud.