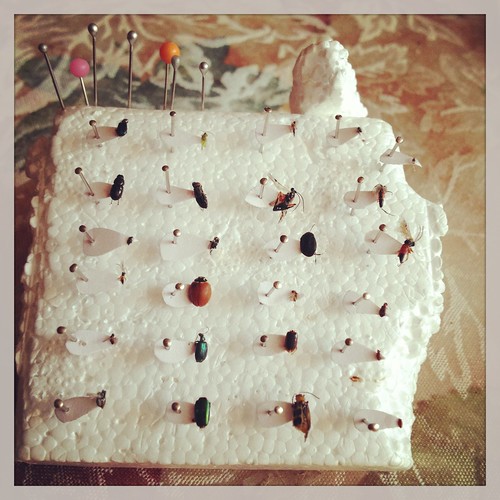
We have been pinning bugs for 2 years now. IN the time I have developed a process for pinning. some shortcuts, and ways to improve the process for myself. I found a nice sized house centipede. I have done alot of reading this winter on insect collecting and entomology taxonomy, so since I have already decided to start live collecting, he was going to be our first specimen.
Photo Steps How to Pin a Bug - Freezer Method - Our Insect Collection and Family Hobby
I also wanted to capture the Steps to Pin an Insect in Photos. Here's a short series in pinning a House Centipede, he was found when we returned home from overnighting at my mom's house. He made a fast trip up my daughter bedroom curtains.I sill get a little creeped out when I first spot an insect, but my reaction quickly passes and I went into collecting mode.
What You Will Need to Pin Bugs:
- A plastic or glass collection jar - to put the bug in.
- something flat and firm to slide under the bug and trap in the jar.
- a kill jar (learn how to make one here or here) or access to a freezer (method which I used).
- styrofoam
- pins (depending on our level of collecting, you can use straight pins from home or purchase pins designed or pinning bugs that are museum grade)
- tweezers, optional
- clear nail polish or Elmer's all white school glue PVA. Learn more about glues here, and Elmer's glue for bugs here.
- box with secure air tight lid for storage and curing (we use Tupperware)
- bug storage box (we used Ferraro Roche chocolate boxes for our straight pins, but now we have shadow boxes for our bug pins).
- lead pencil and paper for labeling (we use all cotton rag paper, but standard white paper will due). Pencil or a printed label. However I find labeling as we go is easier for us.